CONAN
![]()
Team Members
- Alejandro Mazuera-Rozo
- Camilo Escobar-Velásquez
- Juan Espitia-Acero
- Mario Linares-Vásquez
- Gabriele Bavota
Table of Contents
Purpose
This project was created by the SoftwarE Analytics Research Team (SEART) at Università della Svizzera italiana and The Sofware Design Lab (TSDL) at the Universidad de los Andes. The major goal of the CONAN project is to enable automatic detection of CONnectivity issues in ANdroid apps. Unlike current approaches, CONAN is based on static analysis mechanisms, thus enabling practitioners to identify potential connectivity issues in the early development stages, since all it requires is the source code of the application to analyze.
Video
Publications
- “Studying eventual connectivity issues in Android apps.”, Escobar-Velásquez, Camilo and Mazuera-Rozo, Alejandro and Bedoya, Claudia and Osorio-Riaño, Michael and Linares-Vásquez, Mario and Bavota, Gabriele, In Empirical Software Engineering 2022, Journal Article [DOI] [Online Appendix]
- “Detecting Connectivity Issues in Android Apps.”, Mazuera-Rozo, Alejandro and Escobar-Velásquez, Camilo and Espitia-Acero, Juan and Linares-Vásquez, Mario and Bavota, Gabriele, In Proceedings of the 29th IEEE International Conference on Software Analysis, Evolution and Reengineering 2022 (SANER’22), Research Track Track [DOI]
CONAN in action
A JAR file containing our set of Linter rules has been generated for users to try CONAN, it is available in the following link.
The developer should identify the folder containing the main module of the application of interest (i.e., normally this folder is called app). CONAN’s JAR must be placed inside the subdirectory app/libs. If the libs folder does not exist inside app, it must be created. Android Lint is IDE-independent, which means it can be run from the command line as follows: ./gradlew :app:lint. After execution, a report is generated; CONAN adopts the same output format of Android Lint describing the identified connectivity issues in a structured HTML file. For each identified issue CONAN provides the snippet of code in which it has been identified marking its category as connectivity issues. Fig. 1 depicts an example of a report presenting an issue in which a NT is being performed but the network type is not being validated.
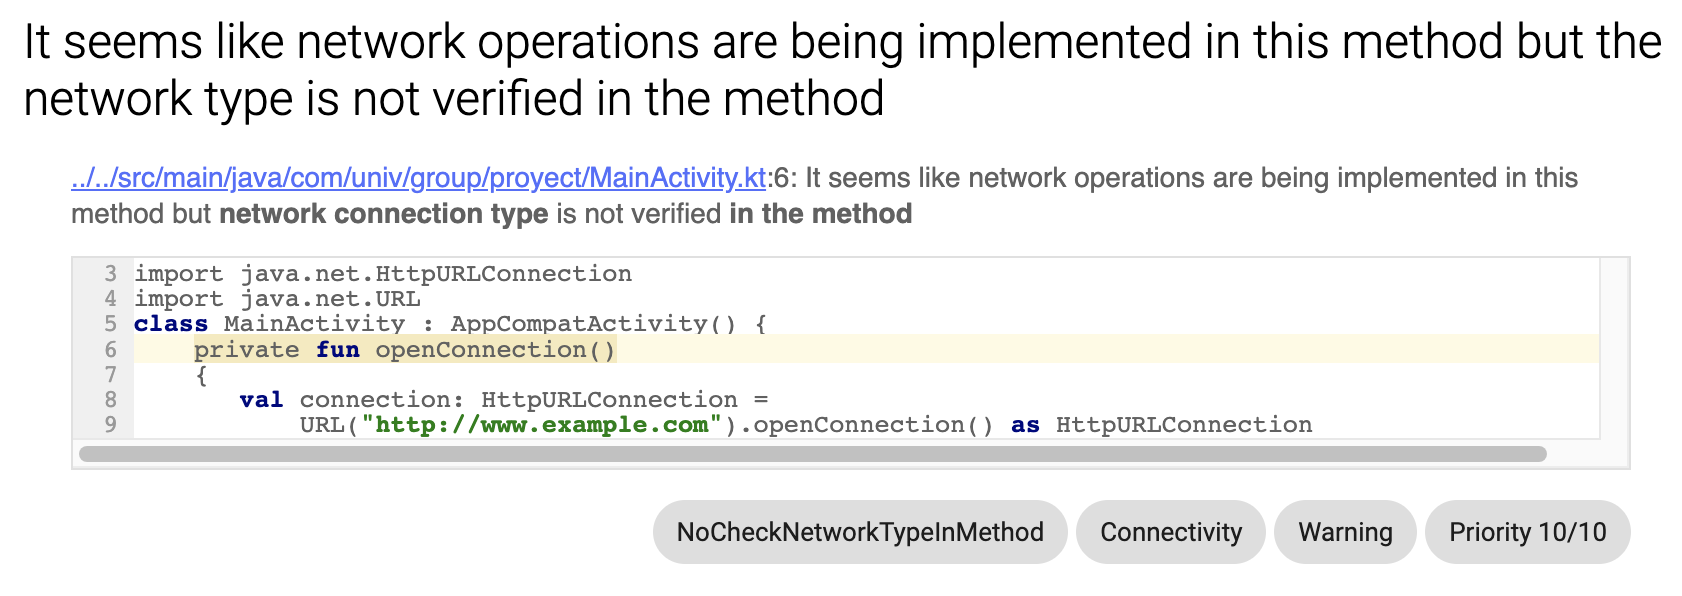
Fig. 1 - No Network type check instance within a report
Moreover, once the JAR file has been included in the project, CONAN can also be used directly in Android Studio. Besides issues being directly highlighted in the editor, a developer can trigger our set of Linter rules by pressing Inspect Code… in the Code menu. Fig. 2 depicts inspection results in the Problem panel, presenting the developer a list of connectivity issues as well as their description.
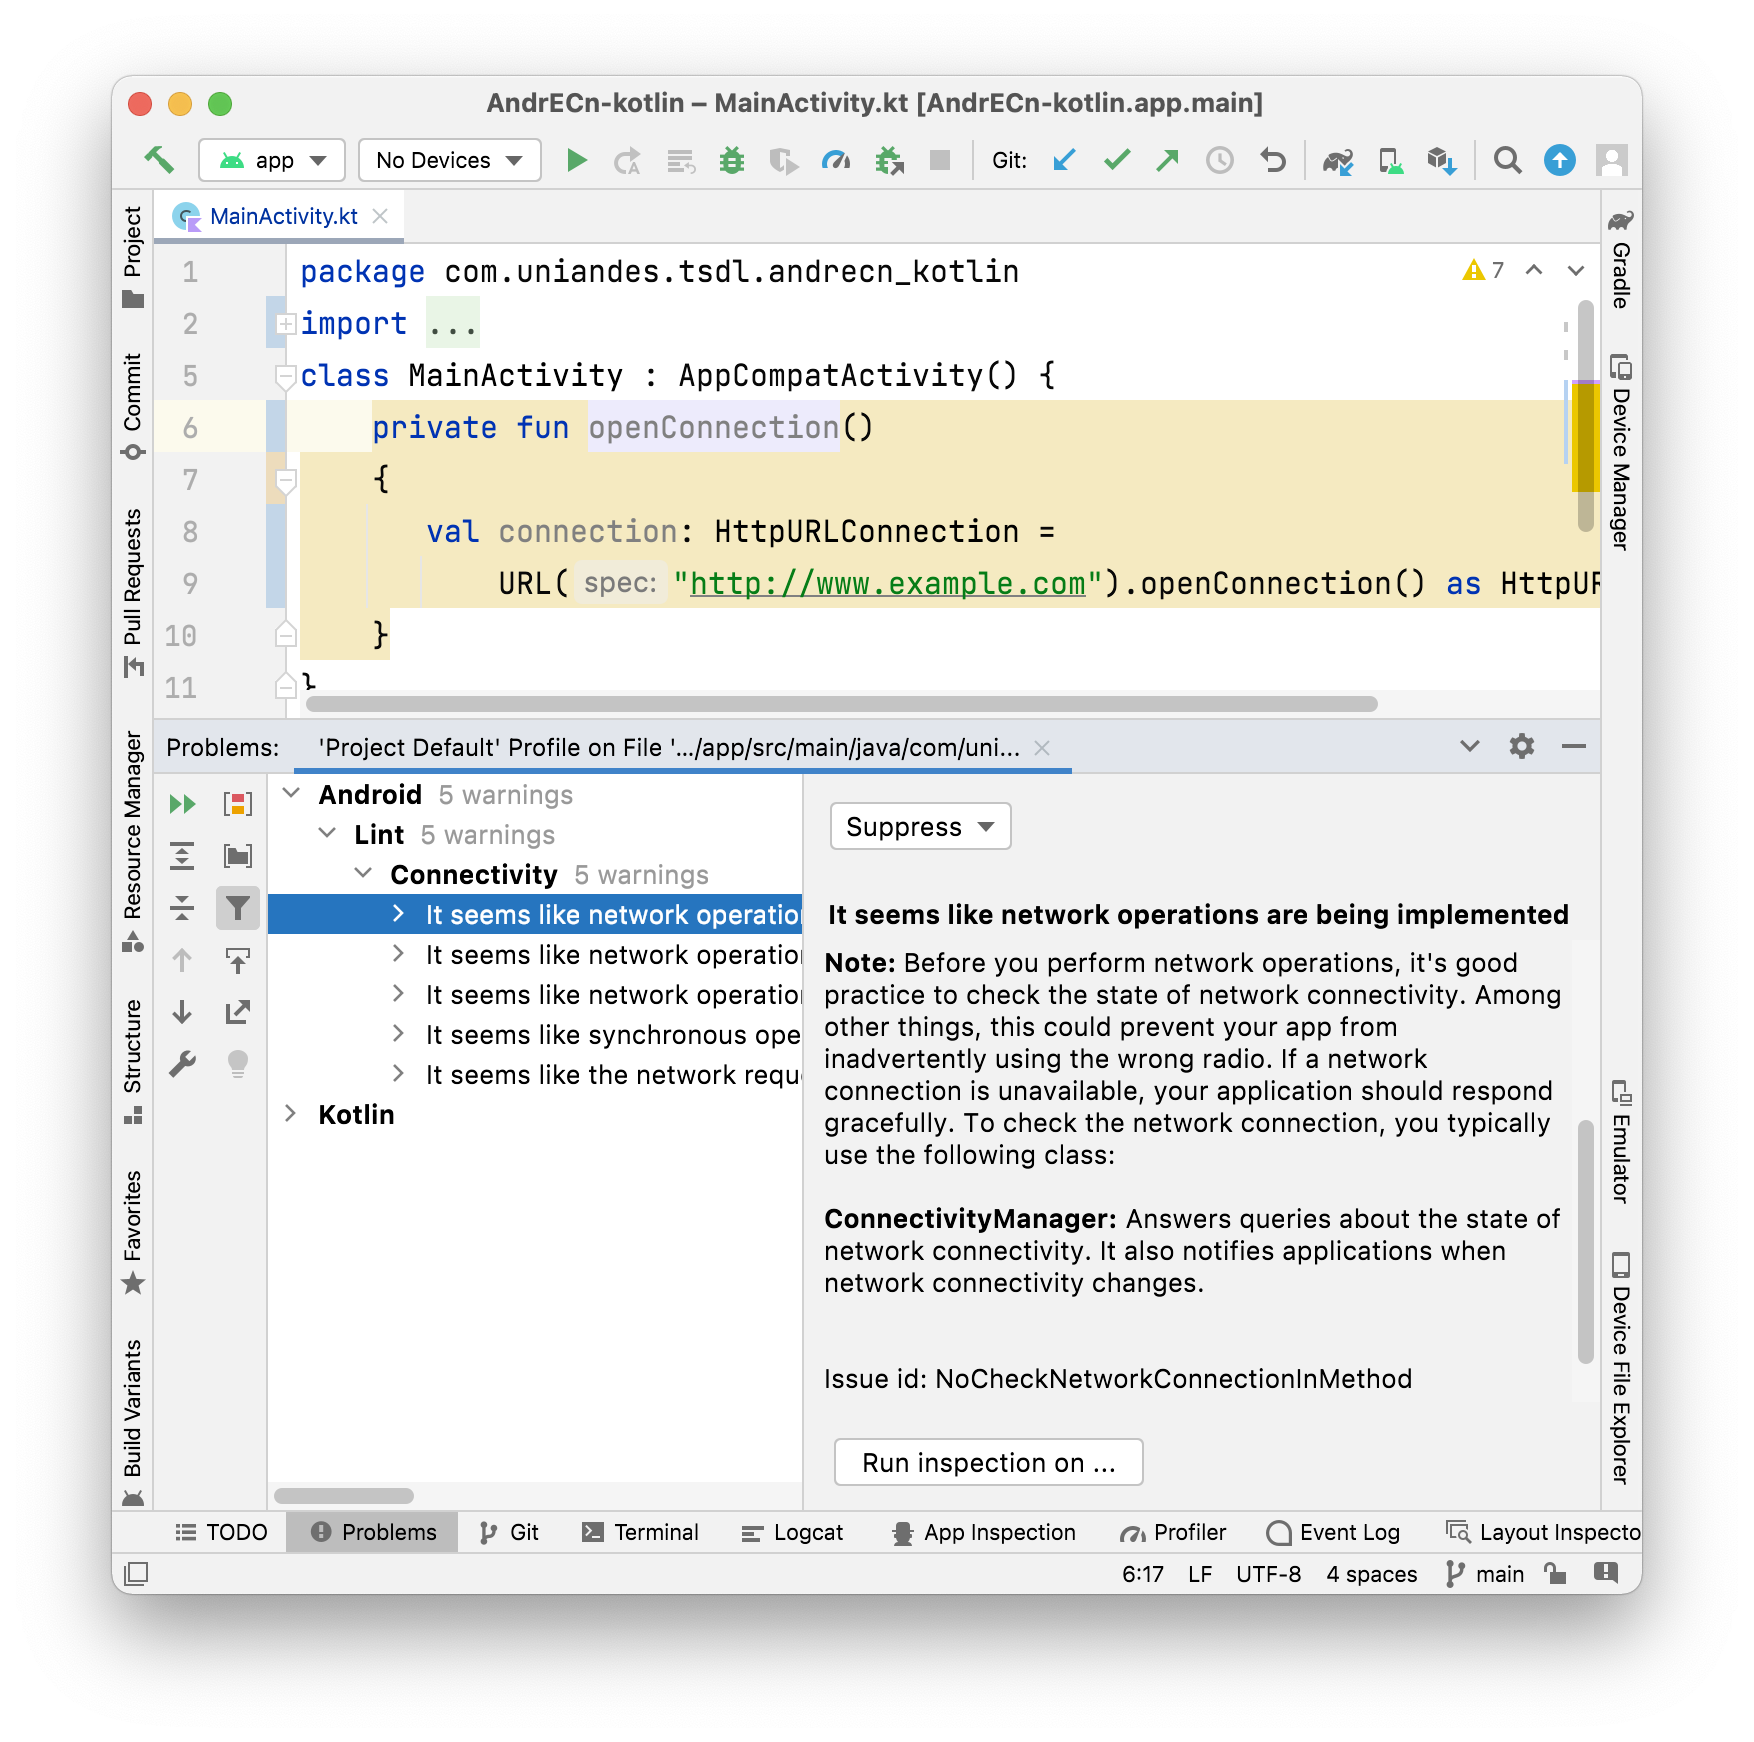
Fig. 2 - Connectivity issues warnings in Android Studio
CONAN Architecture Overview
Fig. 3 depicts CONAN integration in Android Lint. Overall, Lint’s open-closed model allows for the addition of custom checks. Given the set of Java classes defining Android lint internals (i.e., com.android.tools.lint), the main idea behind building customized checks is fundamentally to define custom issues (2) (Issue::class) (i.e., potential bug in an Android application), and declare them in a custom registry(1) (IssueRegistry::class) (i.e., registry which provides a list of checks to be performed on an Android project). Each issue needs to be mapped to a custom detector(4) (Detector::class) responsible for analyzing the issue as well as its (5) (Scope::class), meaning the set of type of files (e.g., Java files) a detector must consider when performing its analysis. Such a mapping relation is performed by defining a custom Implementation(3) (Implementation::class).
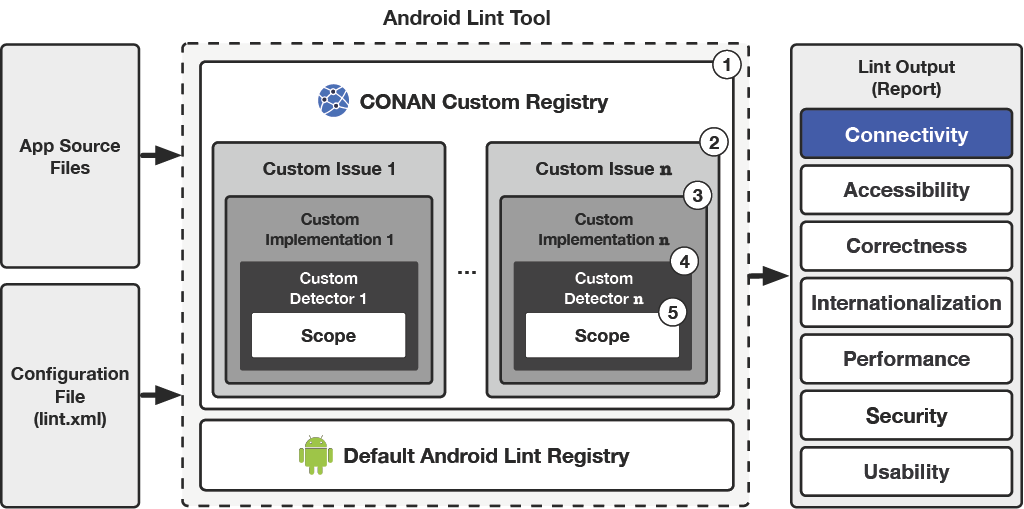
Fig. 3 - Overview of CONAN integration in Android Lint
(1) Registry:
A Registry is a list of Issues that Lint addresses given a JAR of Lint rules. The default list of Issues being checked is included in the BuiltinIssueRegistry class. Therefore, the inclusion of custom Issues requires the provision of a custom Registry, which will be packaged inside the resulting JAR file when publishing custom lint checks, and will point to the newly provided Issues
(2) Issue:
An Issue represents a potential bug in an application that Lint should check, each issue has associated metadata such as: ID, description, severity (e.g., WARNING), priority (i.e., 1-10), explanation, and a category (e.g., Connectivity). By convention, issues are registered inside the companion object of the corresponding detector.
(3) Implementation:
The Implementation is the component of an _Issue} containing information about how a given _Issue} is actually analyzed, such as which _Detector} class to instantiate and which _Scopes} the detector covers.
(4) Detector:
A Detector is the element scanning through code to find and report Issue instances. Detectors can identify and report multiple Issue types. A Detector implements one of the Scanner interfaces in order to scan code (i.e., XmlScanner, JavaScanner, and ClassScanner, used for XML files, Java & Kotlin files, and class files, respectively). The scanners traverse the UAST, thus accessing to specific pieces of code related to our Issues.
(5) Scope:
A Scope is an enum listing various types of files that a Detector may analyze, since an Issue can be present in said files. Possible options include resource files and Java source files. For instance, if the Issue is framed in the Android Manifest, the Scope.MANIFEST_SCOPE should be set.
Hosted on GitHub Pages - Theme by orderedlist